Every time someone asks me how vacuum sealers actually work, I start with the same mental image: take a jar, suck out most of the air, and seal it shut. That’s the whole concept in a nutshell—but the engineering to make that reliable at scale is genuinely interesting, and understanding it helps you get better results with whatever sealer you’re using.
The Physics Behind the Process
At its core, vacuum sealing is about negative pressure. Your vacuum sealer creates an environment where the pressure inside the bag is lower than the atmospheric pressure outside. Nature abhors a vacuum—air molecules rush to fill any space—so when you evacuate the air from inside a bag, the atmospheric pressure outside pushes the bag walls inward, compressing the contents and pulling the walls tight against them.
The technical specs get thrown around a lot: -80 kPa, -90 kPa, 600 mmHg. What does that actually mean? Standard atmospheric pressure is about 101 kPa (or 760 mmHg). When a sealer claims it reaches -80 kPa, it’s saying it removes enough air to leave pressure equivalent to about 21 kPa absolute—roughly 20% of normal atmospheric pressure. A deep vacuum chamber might hit -99 kPa, leaving only 1-2% of original atmospheric pressure inside.
The practical difference between -80 and -99 kPa is real but often overstated for food preservation. Even at -80 kPa, you’ve removed enough oxygen to dramatically slow spoilage. The extra 10-15 kPa of vacuum matters most for specialized applications, not everyday food storage.
Two Designs, Two Principles
Vacuum sealers split into two fundamental categories, and understanding which you have matters enormously for everything from bag selection to performance expectations.
External suction sealers (also called nozzle-style or clamp-style) keep the bag outside the machine. You place the open end of the bag into the sealing area, and a suction nozzle pulls air from inside the bag through that opening. The bag stays visible throughout the process. These machines are generally more affordable, use less counter space, and work with bag rolls where you cut the bag to any length you need.
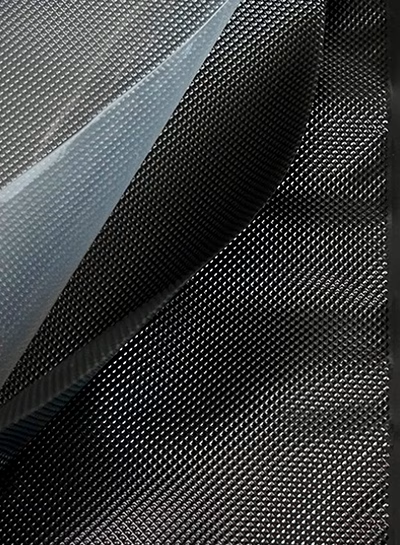
The limitation is physics: the suction nozzle can only pull air from the area immediately around it. The smooth inner surfaces of a bag would collapse together under vacuum, blocking air flow from the far end of the bag. That’s why external sealers require embossed or textured bags—the raised channel pattern keeps pathways open so air can flow from the entire bag interior to the suction point.
Chamber vacuum sealers work differently. You place the entire bag inside a sealed chamber and close the lid. The machine then evacuates air from the entire chamber at once—including the air inside the bag. Because the pressure equalizes inside and outside the bag simultaneously, the bag walls don’t need texture to stay open. Chamber sealers can use smooth OR embossed bags, and they achieve deeper vacuum levels because the entire chamber acts as the vacuum source.
The Sealing Mechanism
Removing air is only half the process. Once you’ve evacuated the bag, you need to seal it before air rushes back in. That’s where the heat sealing bar comes in.
Most vacuum sealers use a nickel-chromium (NiCr) wire as the heating element. When you activate the seal cycle, this wire heats to temperatures between 180C and 220C—hot enough to melt the polyethylene (PE) inner layer of the vacuum bag without burning through the outer nylon layer.
The wire sits beneath a layer of PTFE (Teflon) tape, which prevents the molten plastic from sticking to the heating element. Two metal bars then press the bag closed against this heated wire for a precise dwell time—typically 0.5 to 2.5 seconds depending on bag thickness. The heat fuses the two sides of the PE layer together, creating a hermetic seal.
This is also why bag material matters. Cheap bags with inconsistent PE layer thickness or poor-quality coextrusion will seal unevenly. A properly manufactured multi-layer bag (typically PA/PE or PE/PA/PE structure) gives the sealing wire consistent material to work with, producing reliable seals every time.
The Cooling Phase
After the heating phase, most quality sealers include a cooling cycle. Even after the heating element shuts off, the PE layer remains soft and vulnerable to separation. Cooling allows the plastic to crystallize properly, achieving full seal strength. Rushing this phase—handling or stacking bags immediately after sealing—is one of the most common causes of seal failures days later in storage.
The Vacuum Pump Role
The unsung hero of any vacuum sealer is the pump. Different pump types define the machine capabilities:
- Diaphragm pumps: Common in consumer and light commercial models. Lower vacuum levels (typically -70 to -80 kPa), compact, affordable, but slower and generate more heat.
- Rotary vane pumps: Found in mid-range commercial machines. Better vacuum levels (-80 to -90 kPa), faster extraction, more durable.
- Piston pumps: Used in heavy-duty commercial and industrial equipment. Achieve the highest vacuum levels (-90 to -99 kPa), handle continuous operation, but are louder and more expensive.
Pump quality and maintenance dramatically affect performance. A pump past its prime won’t reach the vacuum levels the machine was designed for, and you won’t even know it—the machine will cycle through its normal motions while delivering a subpar result.
Why Bag Material Matters
Most vacuum bags aren’t simple plastic. They’re multi-layer coextruded films designed for specific performance characteristics. The typical structure:
- Outer layer: Nylon (PA) for puncture resistance and structural strength
- Middle layer: Often EVOH for oxygen barrier properties
- Inner layer: Polyethylene (PE) for food contact safety and heat sealing
The oxygen barrier is what makes vacuum sealing effective. Nylon alone lets oxygen through relatively quickly. EVOH provides an excellent oxygen barrier, but it’s hygroscopic—absorbs moisture and loses effectiveness. The surrounding PE and PA layers protect the EVOH from moisture exposure. This is why you can’t just use any plastic bag: the layering structure is what delivers the shelf life extension you’re after.
Cheap bags often use thinner barrier layers, single-layer PE, or inferior coextrusion that delaminates during storage. The difference between a $0.15 bag and a $0.40 bag is real engineering—and the expensive bag almost always wins on long-term performance.
Common Misconceptions Worth Debunking
Myth 1: Perfect vacuum is necessary for food safety. Not true. Removing 80% of oxygen is enough to dramatically slow aerobic bacteria. The remaining oxygen isn’t dangerous in refrigerated storage.
Myth 2: Vacuum sealing kills bacteria. It doesn’t. Vacuum sealing slows bacterial growth but doesn’t sterilize. Start with quality food, not compromised product.
Myth 3: Any plastic bag works. Only multi-layer barrier bags designed for vacuum sealing actually deliver the oxygen reduction that makes the process worthwhile.
Myth 4: Higher vacuum is always better. For delicate foods like berries, soft cheese, or baked goods, over-vacuuming can crush or deform products. The right vacuum level matches the product, not the machine’s maximum capability.
Putting It All Together
When you press that start button, here’s what actually happens in sequence: the pump begins extracting air from the bag (or chamber), creating negative pressure that draws the bag walls inward. Once the target pressure is reached, the heating wire activates, melting the PE layer. The bars press together, fusing the seal. Then cooling begins to set the plastic. Finally, air re-enters the chamber (for chamber machines) or the suction releases (for external machines), and you’re left with a compressed, sealed package with most of the oxygen removed.
Understanding each step helps you diagnose problems, optimize your process, and make better purchasing decisions. A vacuum sealer is only as good as the interaction between its pump, sealing mechanism, and the bags you use with it.